Part IV of the Series Web Development for Experienced (Non-Web) Software Engineers
This tutorial shows how to use Visual Studio 19 to create and run an ASP.NET Core web app. This post might be a bit redundant consider there are so many versions of this online. For completeness sake, we have it here.
Prerequisite:
- .NET Core 3.1.1 SDK
- Visual Studio 2019 16.4 or later with the ASP.NET and web development workload
Note: This series is using Visual Studio. For tutorials using Visual Studio Code and command-line interface, you can refer to this tutorial from Microsoft
Create Web App:
At the time of the writing, ASP.NET CORE 3.1, the recommended starting point is to use a Razor Page. We’ll discuss the differences in the next tutorial. Let’s just get to building the first web app.
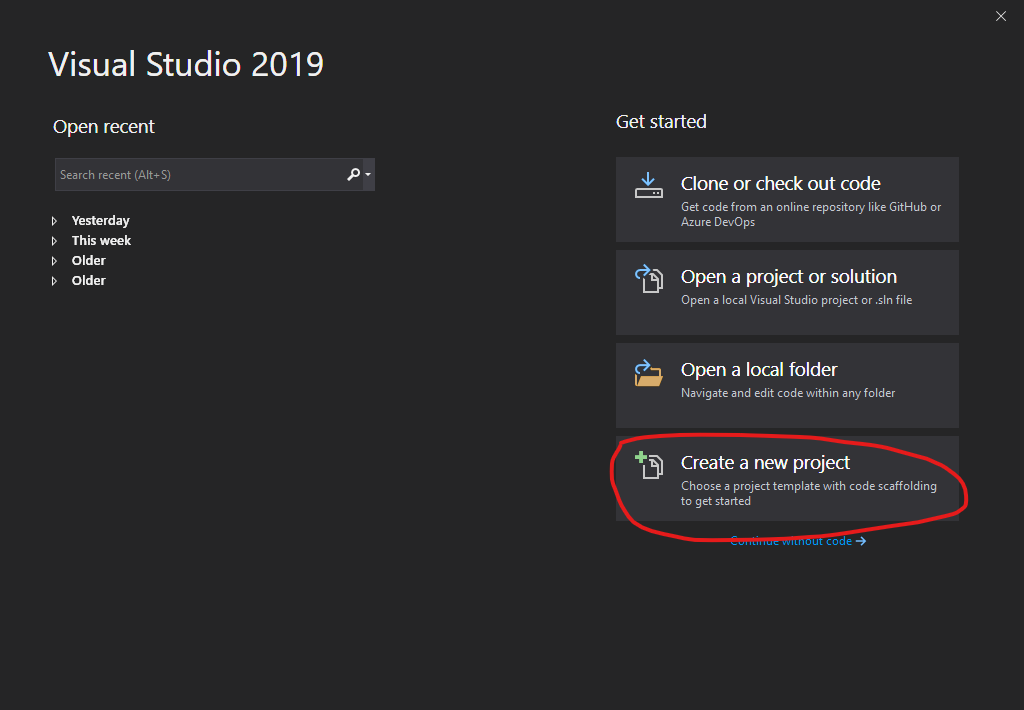
Open Visual Studio, click “Create a new project”
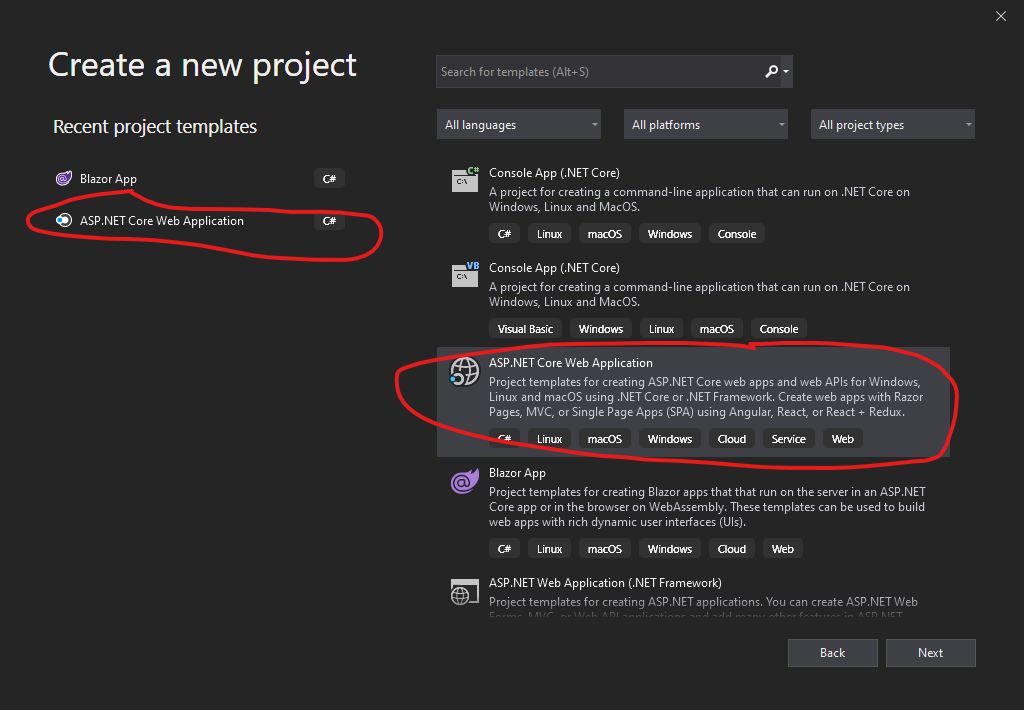
In Create New Project, Select ASP.NET Core Web Application on the left, and select ASP.NET Core Web Application, then click next.
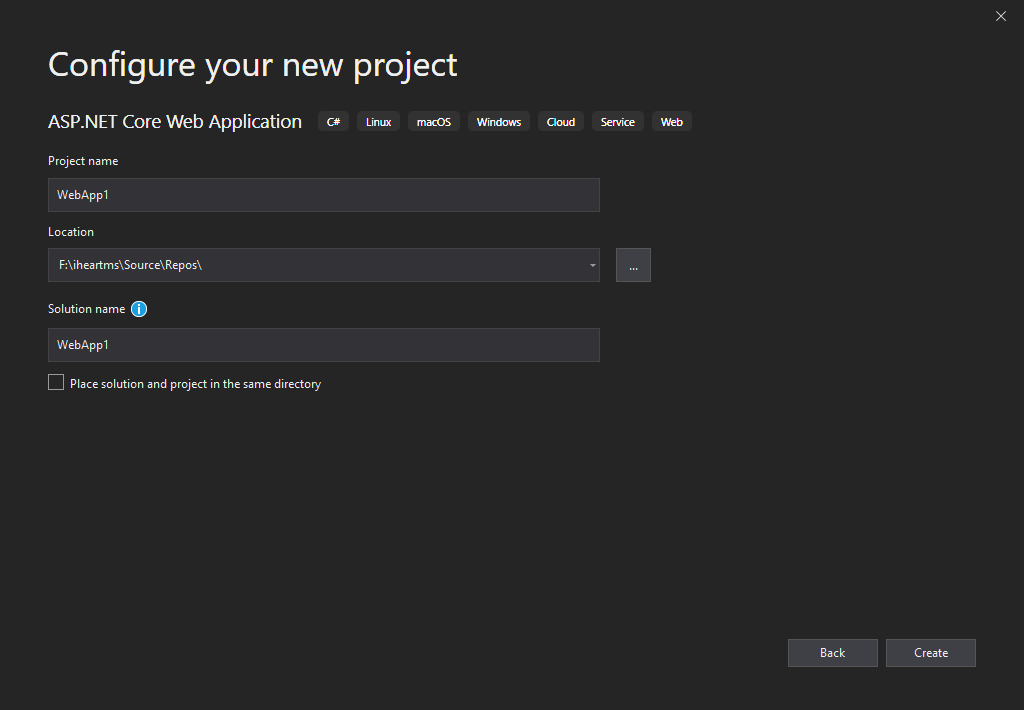
Configure the new project by typing Project name. Where you want to store the project. And the Solution name.
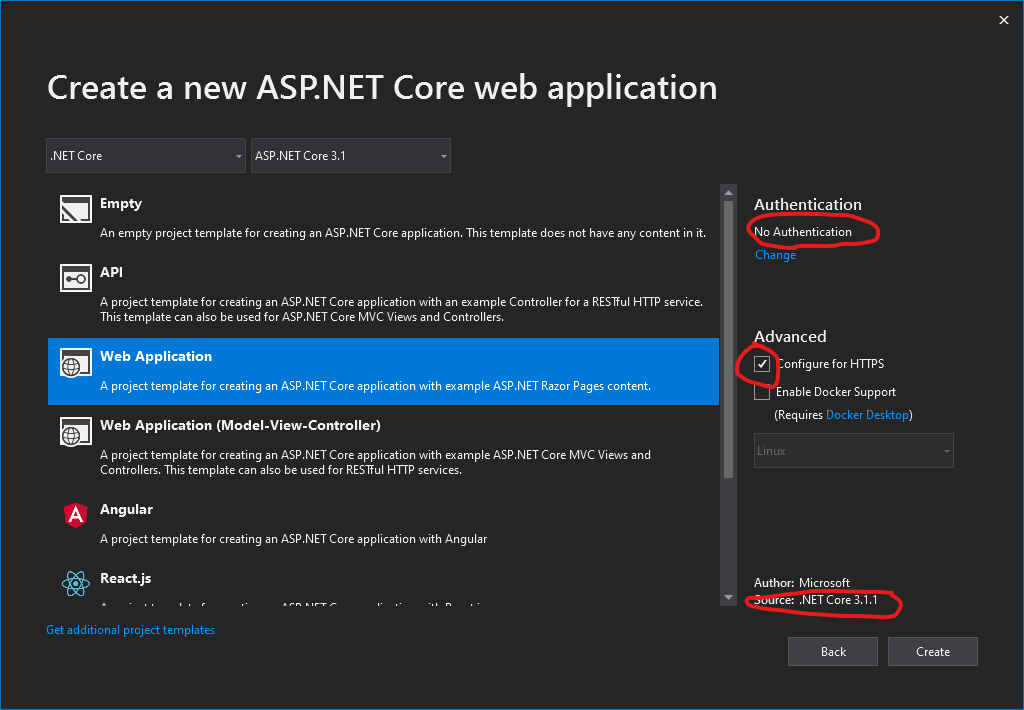
Select Web Application (which will generate Razor Page template). Select “No Authentication” (which will not generate identity/user accounts). Check Configure for HTTPS (for security). Click ‘Create‘.
Your Project is Created
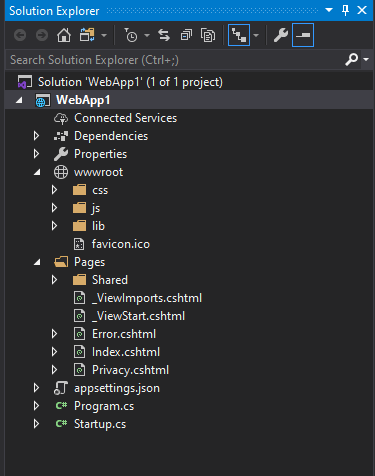
Run the App
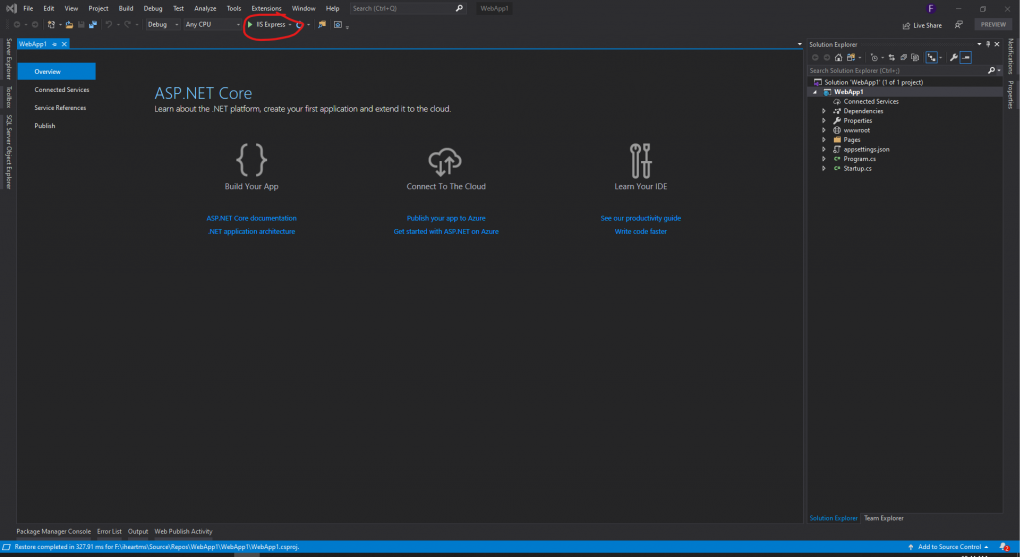
Click IIS Express to run the app
Note: If there’s a popup dialog asking “Would you like to trust the IIS Express SSL certificate”, click yes.
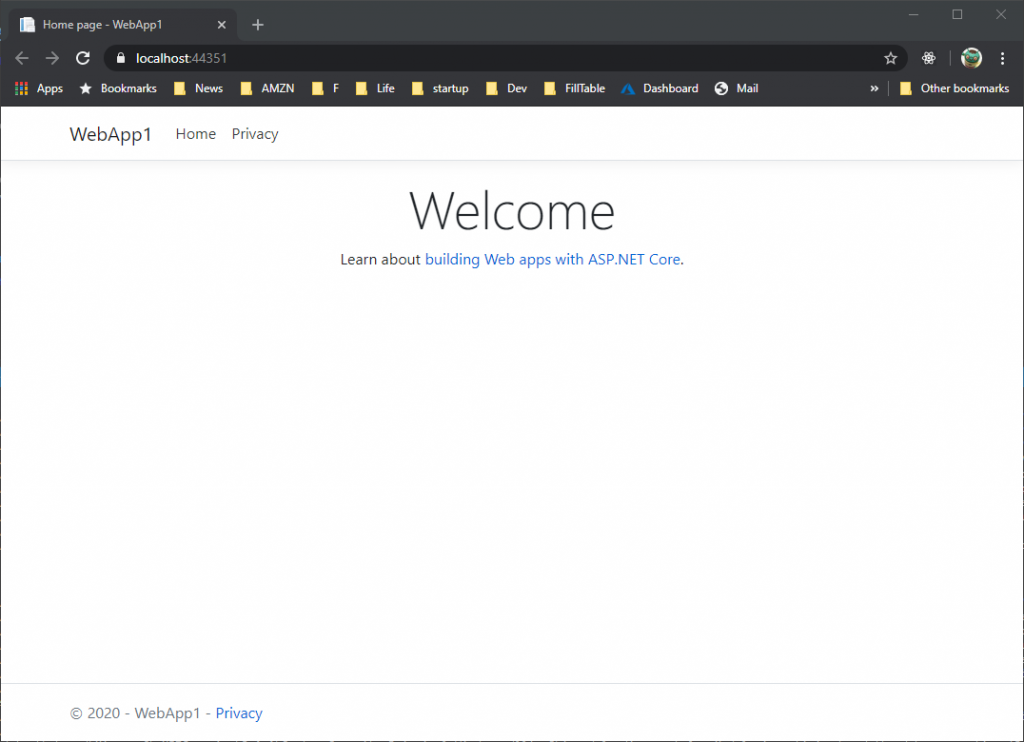
IIS Express should run and your selected browser should open to localhost with a randomly selected port. Your Web App is running!
Note: Localhost only serves web requests from the local computer. When Visual Studio creates a web project, a random port is used for the web server.
Recap:
In this tutorial, you:
- Create a Razor Pages web app.
- Run the app.
